Philips CX50 - Ultrasound Set up
ULTRASOUND SETUP
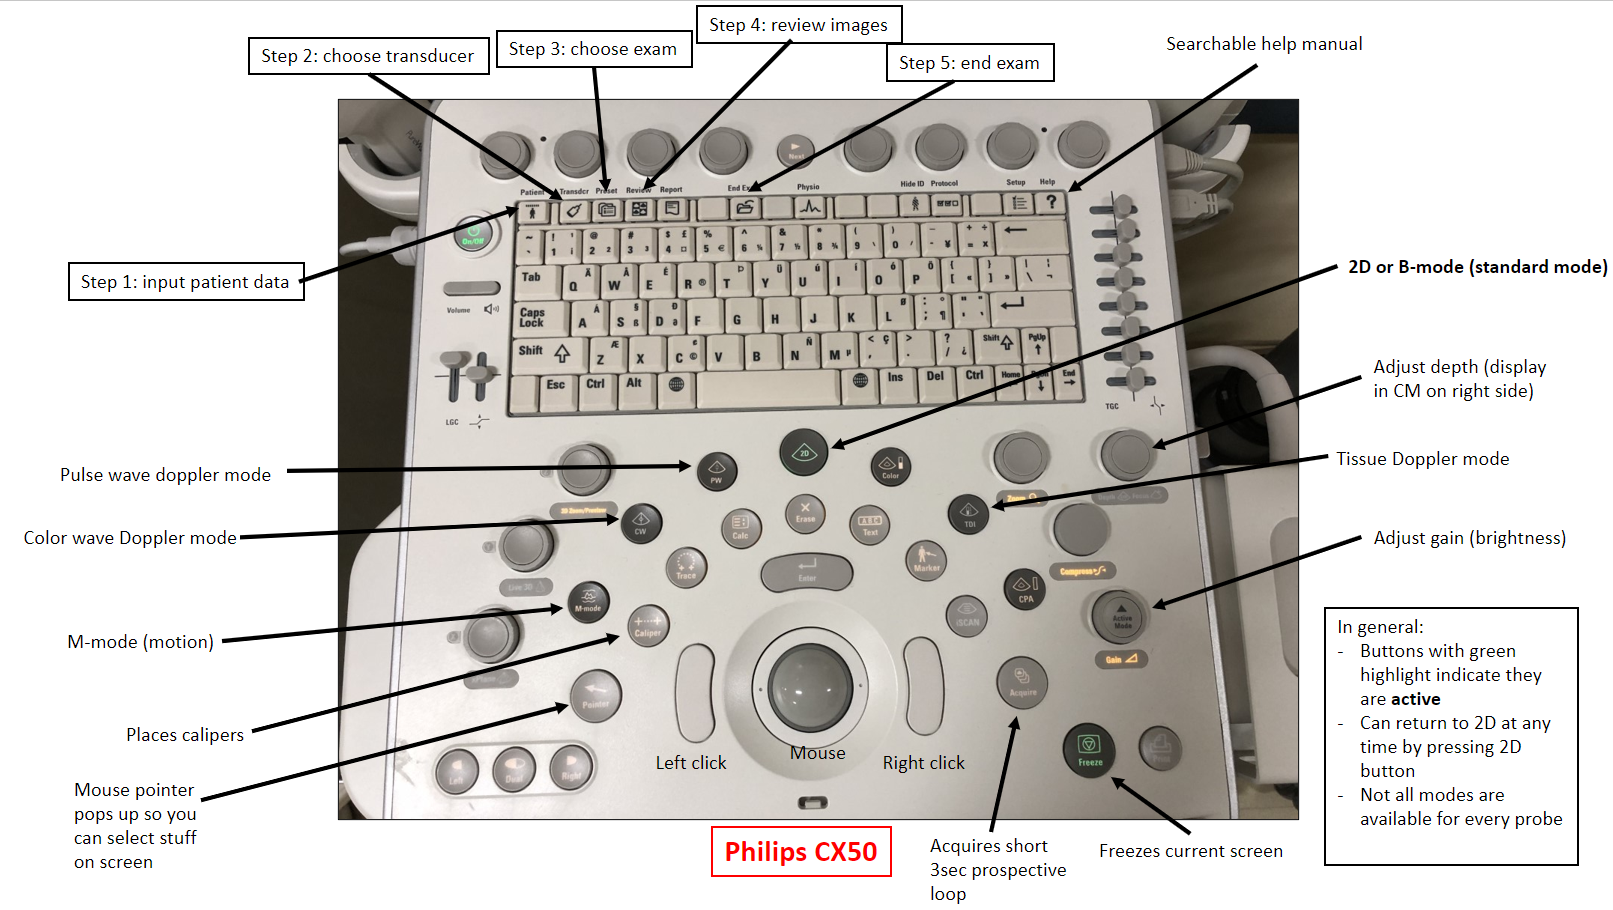
****In general, just go over the topmost buttons from left to right
Step 1: Enter patient data
- Press PATIENT button along top
- In the patient identification display, click NEW
- Enter last name and MRN (press TAB to move from field to field)
- Needs at a minimum patient last name in order to proceed
- Click OK
- If unable to input data for some reason, push END EXAM button to reset the machine
- Entering this information allows the patient data to show up on Qpath for later documentation
- If desired, can select TEMPORARY ID (top right) and input patient info later
Step 2: Select transducer
- Press TRANSDUCER button along top
- Chosen transducer will appear at top left of screen
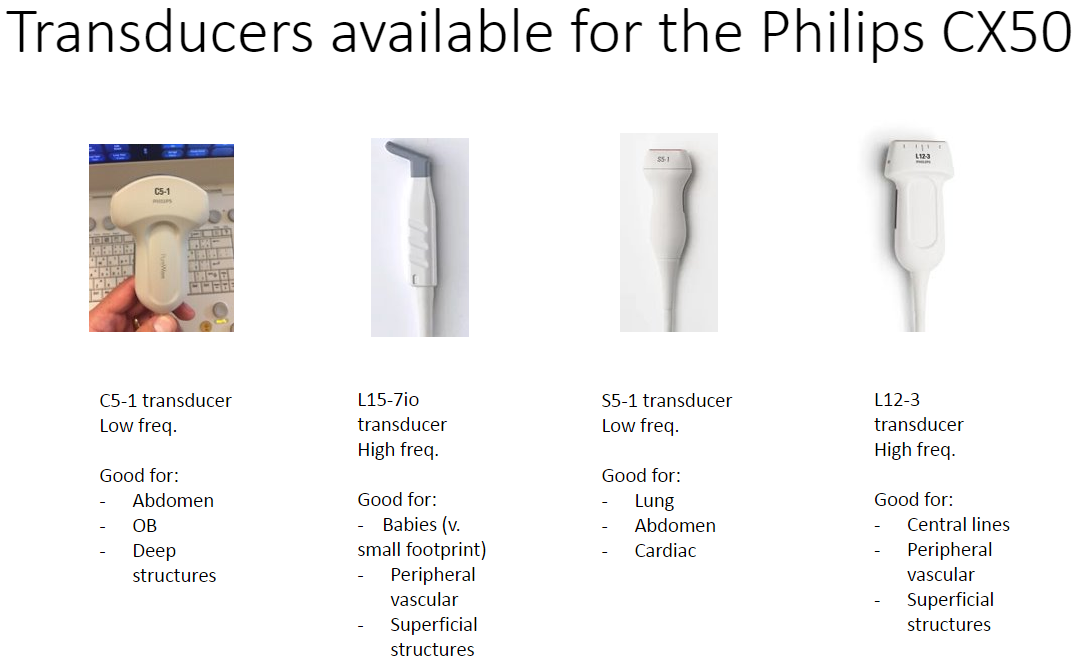
- There are 4 probes currently available on the Philips CX50
- The appropriate probe will depend on the study
- Things to consider:
- Low frequency probes are better for deeper structures
- High frequency probes are better for superficial structures
- Probes with smaller footprints can easily look between ribs
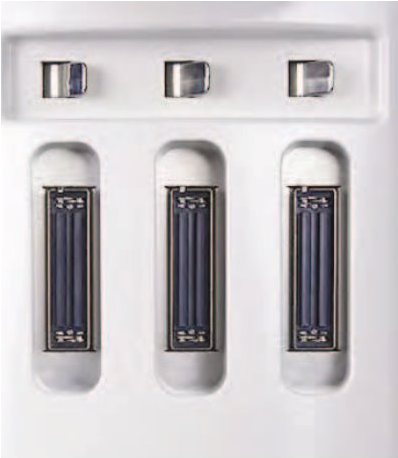
Lastly, make sure your chosen transducer is plugged in! You can connect and disconnect probes during live imaging using the 3 mulitport adaptors by toggling the metal tabs at the top. Make sure to put the rubber probe plug covers over the plugs when not in use!
Step 3: Select a preset exam type
- Press PRESET button along top
- Choosing a preset exam type optimizes brightness, depth, focal range etc. for your study
- If you want to return to your preset after adjusting image, simply press the PRESET button again
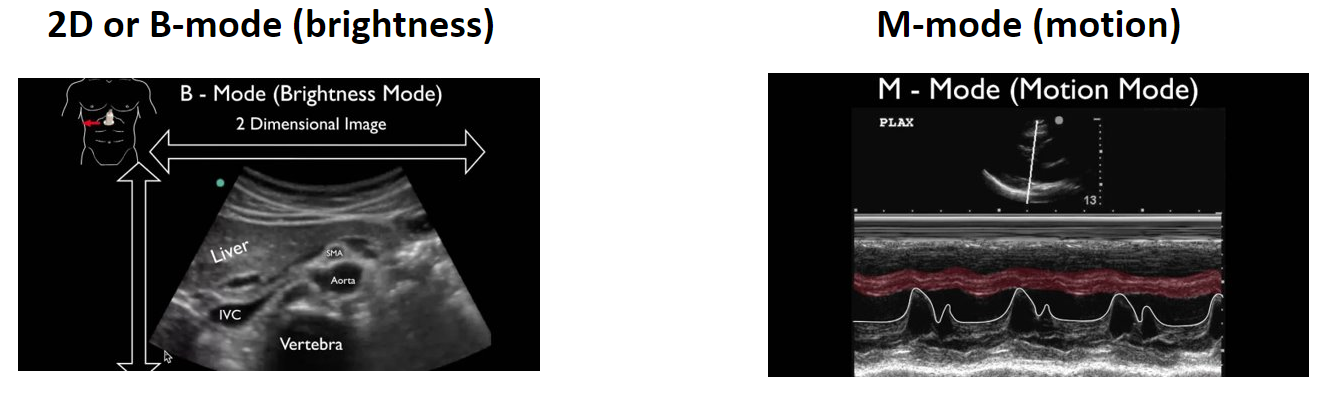
- Most studies will use the 2D or B-mode (brightness)
- M-mode is for motion mode
- D-mode is for doppler mode
- Common presets: lung, abdomen, cardiac, gyn
Perform your ultrasound exam
- To control image brightness, adjust GAIN
- To increase/decrease depth, adjust DEPTH. Distance from probe will be displayed in CM on the right side of the screen
Step 4: Acquire and review images
- Save your still images
- Make sure you have a working image up on screen
- Press FREEZE and you can scroll back through your study with the mouse
- Press ACQUIRE to save an image (thumbnail will pop up on R side of screen)
- Save a loop
- Press ACQUIRE and it will save the next 3 seconds of video (can hear start beep and end beep)
- Thumbnail will appear on R side of screen
- Review images
- Press POINTER to select images/loops on R side of screen; can display 2 side by side
- Can easily review study with the attending
- Can still adjust gain/depth while in review mode
Step 5: End exam
- Press END EXAM button long top
- Easy way to start over or quit out of an existing exam
- Clean ultrasound machine for next user using red top or gray top wipes or soap and water (do NOT use purple wipes)


